
Using NetInfo to check internet connection in React Native

Getting strong internet connectivity is what every mobile user looks for but what if the connection is broken or disabled? You get an alert message that you are not connected to the internet. Right? Do you know what it takes for developers of React Native app development companies build such an interface? Let's see how they simplify the task using a third-party library of React Native, NetInfo.
Let's start with the prerequisites context.
Installing software for the Environment setup
The step of the Environment setup is crucial. You cannot move forward with building a React Native project if you have not installed the required SDKs and software. For the current rocket, you require JDK, Node, Android Studio, and React Native CLI.
You have the choice to select other Development OS such as Linux and macOS. In that case, the process and software would be different. Since I want to develop my project on Windows, I need the said software.
Also, you can choose either ExpoCLI or React Native CLI tool. In the current regard, I have selected the React Native CLI tool.
Check the attached article for further reference.
Creating a template folder
A template that we will be building for the project is just a regular folder that you have to create in your local system. However, the only specification is that you have to run a certain command to build this template.
For this, consider a local folder in any drive. Open a terminal from the folder and run npx react-native init net-info --version 0.71.2. In it. It will immediately build the template in your local drive. You can see all the small folders are built in the ‘net-info’.
Going forward, you have to create this folder for every project.
Configuring third-party package
For some projects, you have to import components that are not available from the native libraries and you need those components from the third-copy library. You cannot randomly call the components and use them in your project files. You need to install the libraries and then import important components from the libraries.
Here, we need @react-native-community/netinfo. Its installation process includes executing the command line npm i @react-native-community/netinfo on the app terminal.
Later, you will use the NetInfo component, and the hook useNetInfo from this library. This uses API support to get information about Internet connectivity.
Let's get started with the coding part but before that segment, we have to store an asset folder.
Creating an asset folder for the project
An asset folder is required when a project needs to store any form of images. Here, the project is about enabling or disabling the connection to the internet. So, when there will be no internet connection to the user’s mobile, this image showing no connection will be displayed on the screen.
For this project, I have stored a picture as shown in image 1 in my asset folder.

Image 1
This step is necessary before adding a codebase.
Creating the NoConnection.js file
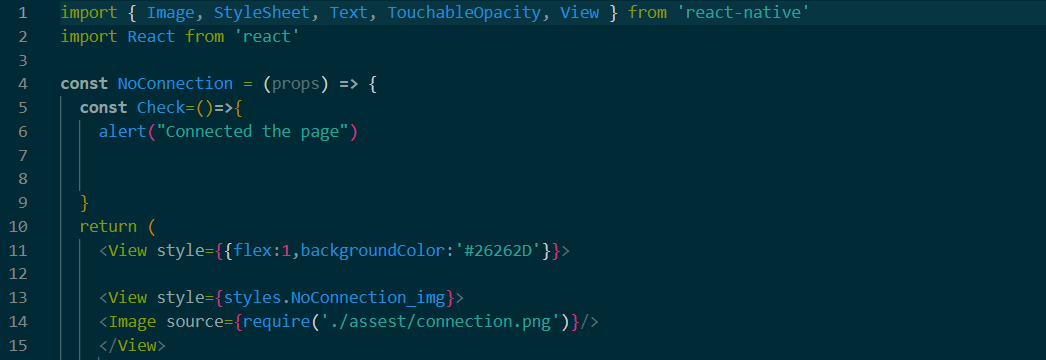
Image 2
This is the main file of the project. It is called NoConnection.js. You can give it a different name based on your project needs and personal preferences.
Then start coding with the import statement. ‘Import’ is used to get the components. Here, these are Text, View, TouchableOpacity, StyleSheet, and Image. The components used so far are for creating the app’s UI. also, you either can or not import the entire React library as shown in the second line.
The code introduces the component NoConnection. This component will be exported later to allow users to use it in the App.js file. Here is the feature of code reusability in React Native. An alert() function is stored under the ‘Check’ variable.
It then returns the Image embedded under the View element. There are some styling attributes used with the View elements. The image source is taken from the asset folder.
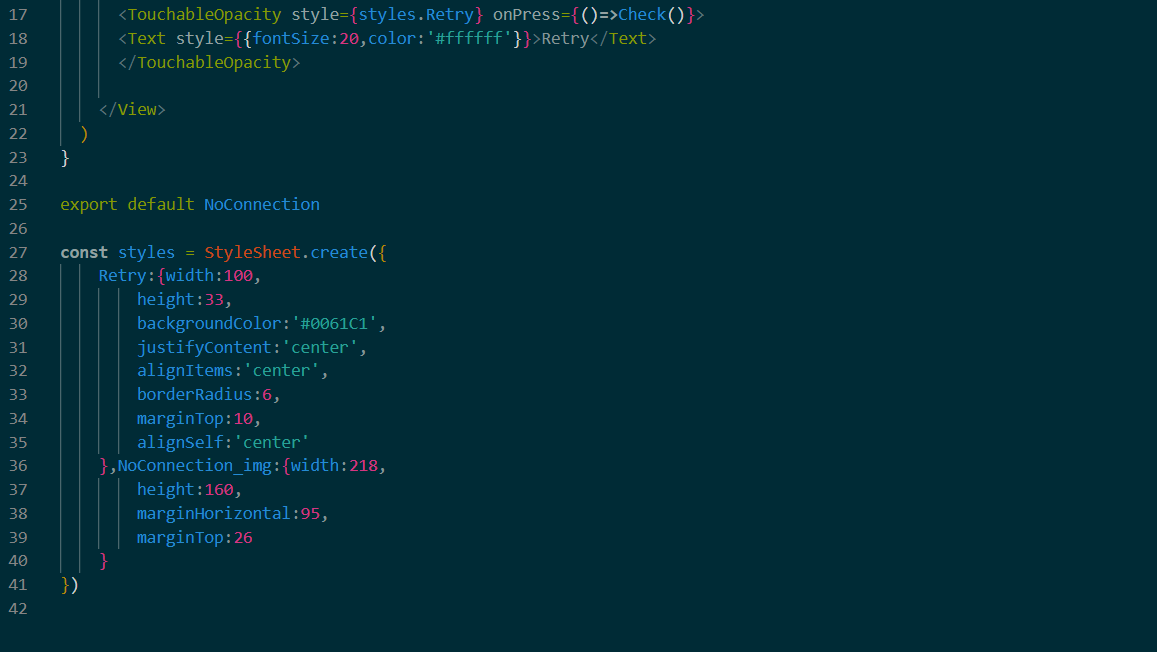
Image 3
It uses the touchableOpacity component to make the button clickable. The text ‘Retry’ will be added to the button. It has an event handler onPress which will call the ‘Check’ function. So, the button will be activated as soon as the user clicks on the button.
The prime section of the NoConnection.js is done.
Complete the code with the export statement and consideration of the styling objects: NoConnection_img and Retry button.
The Retry object has a width of 100, height of 33, background color of #0061C1, justified content and alignment of items are at center, border radius of 6 pixels, margin-top of 10 pixels and a self-alignment of the content is at the center.
Similar different properties and definite values are added to it.
Creating theApp.js file
This is the most important file of all the React Native projects. All the files and components are embedded into it. Here, the NoCoonnection component will be used in this file.
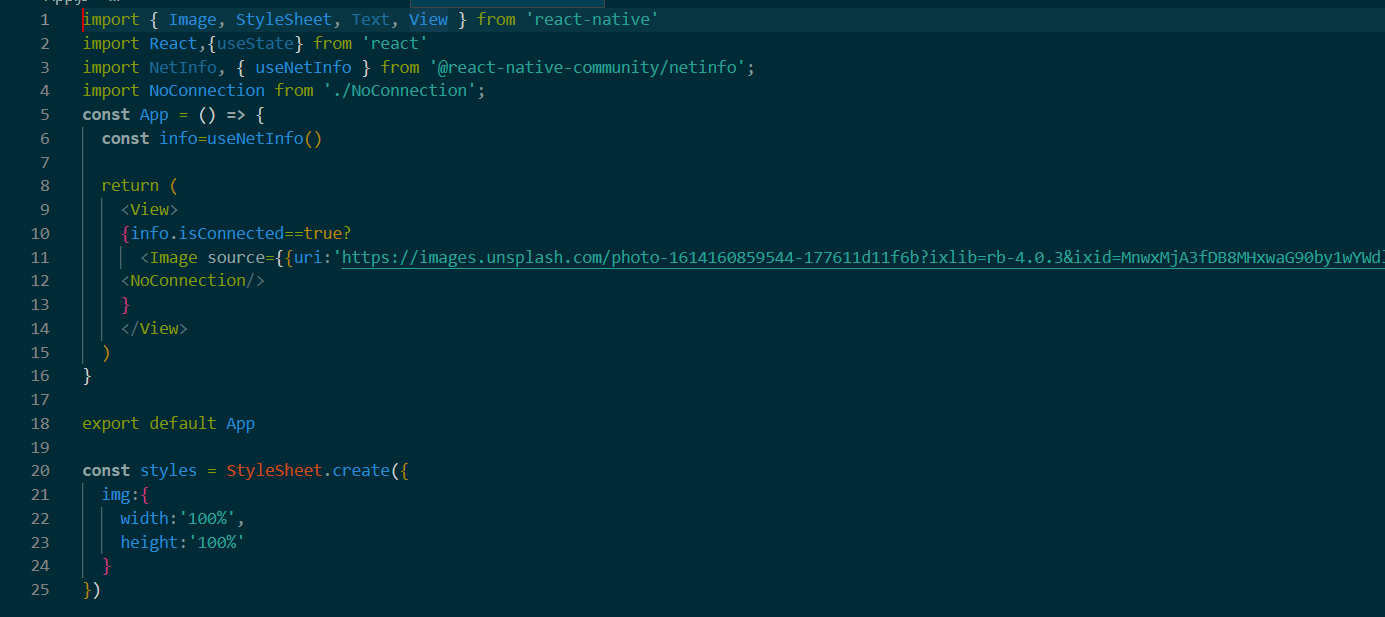
Image 4
Start the codebase as usual with the components. Note that the code imports NoConnection. Also, the code imports useNetInfo to keep track of the internet status.
(:) operator is considered JS language. It is used to deliver conditional operations. Here, the state of the internet is enabled or disabled. In case it is disabled, the NoConnection component is rendered on the screen, where the user will see the image showing ‘No Internet Connection’. On the other hand, when the internet connection is restored, the image from the given source is retrieved and shown on the screen.
Steps to run the program and check the state of the internet
Let's check whether we have correctly built the program or not.
- Open the VS Code editor from your template folder and create a terminal.
- Run npm install and then pass npx react-native run-android on the terminal.
- Wait for some time till it bundles.
As soon as your emulator starts, the app will be displayed on the emulator.
Refer to image 5 for the output of the project.

Image 5
The users will be able to get such a display on their mobile devices when they switch on and off their internet connection.

A science graduate who has a keen interest to lean about new technologies and research area. With an experience in the field of data analytics and content writing, she aims to share her knowledge among passionate tech readers.


