Integrating Google map features in your react Native app?

Map integration in mobile apps has become a life-savior feature for every smartphone user. Isn’t it? You are traveling to an unknown place, and getting a reliable direction to your destination is the service that Google map provides. If you are a React Native app developer who uses the framework in the software or app development task. You should check this article to learn how you can use React Native to integrate google maps into your app.
Key learnings to start with the project
- Fetching the data for the preferred location is the most important task in this project. For this, you need to understand the API Calling process. Check my tutorial blog on ‘How to make a GET request to an API from a React Native app’ to get a detailed insight into the concept of API. You can find the unique API key for the current project in its AndroidManifest.xml file. Get this file in the root directory of the app hierarchy. I used the meta-data tag to store the API key for Google Maps.
- Set up the React Native development environment. You should know what and how to install the software to prepare the React Native environment. If you are unfamiliar, I have covered you with all the details. Visit this tutorial blog to get all the steps in detail. Also, consider the software mentioned in the segment under React Native CLI.
- Get a basic understanding of the React Native components, hooks, and props used to build a basic react Native app from this article.
React Native package used
Besides, react Native core components, you need to import other native React Native components from the third-party library. Here, I have integrated two third-party React Native plugins: react-native-mapsand @react-native-community/geolocation.
For the map integration, you have to import two components: MapView and Marker from react-native-maps. Although I imported the Geolocation component from @react-native-community/geolocation, it was not used further in the later part of the codebase.
Note that you have to meet the criteria for the package’s compatibility. You can install the reat-native-maps package in your system only if you have a react-native version of 0.64.3 or newer.
However, if you want to align the geolocation API of your project with that of the browser, you need to add the line: navigator.geolocation = require('@react-native-community/geolocation'); at the root directory (app.js file). Adding this line will also allow you to get backward compatibility.
Explanation of code syntax
You can find the entire codebase in the GitHub repository.
Now let's start with the explanation.
1
2
3
4
5
import React, {useState} from 'react';
import {StyleSheet, View, Dimensions} from 'react-native';
import MapView from 'react-native-maps';
import {Marker} from 'react-native-maps';
import Geolocation from '@react-native-community/geolocation';- This is the code syntax that imports the required components from different React Native packages. This is to ensure the map works.
- It imports React and useState from react.
- Secondly, it imports StyleSheet, View, and dimensions from react-native.
- It imports both parent and child components MapView and Marker respectively from react-native-maps.
- Lastly, it imports Geolocation from
@react-native-community/geolocation.navigator.geolocation =
require('@react-native-community/geolocation');
- It is a JavaScript statement. Here, navigator.geolocation is a property to which I have allotted the value of
require('@react-native-community/geolocation');
const App = () => {
const [coordinates, setCoordinates] = useState({
latitude: 22.57371753630649,
longitude: 88.4376725968472,
});
- Here, the code syntax generates an object named coordinates. It sets its initial value using
useState({})hook. - It has also created another function named
setCoordinates. - You can call this function to change the value of coordinates.
return (
<View style={styles.MainContainer}>
I used the View component with some styling elements to style the MainContainer with MapView and Marker components.
1
2
3
4
5
6
7
8
9
10
11
12
13
14
<MapView
        style={{
          width: Dimensions.get('window').width,
          height: Dimensions.get('window').height,
        }}
        showsUserLocation={true}
        zoomEnabled={true}
        zoomControlEnabled={true}
        initialRegion={{
          latitude: coordinates.latitude,
          longitude: coordinates.longitude,
          latitudeDelta: 0.062,
          longitudeDelta: 0.0121,
}}>- Here, the main component of the app MapView is used.
- As you can see, I used different props for this component. Let’s get into its details.
- Style- It is the object that defines the height and width properties.
- The width and height are set to the window's width and height respectively.
- showsUserLocation- it is a prop that decides if the location of the user is shown on the map. I have set it as true to show the user’s current position (location) on the map.
- zoomEnabled- It is a prop that decides whether the zooming in/out feature of the map is enabled with a double tap, pinch, or other touch gestures. Here, I have enabled it as true to let users zoom in or out.
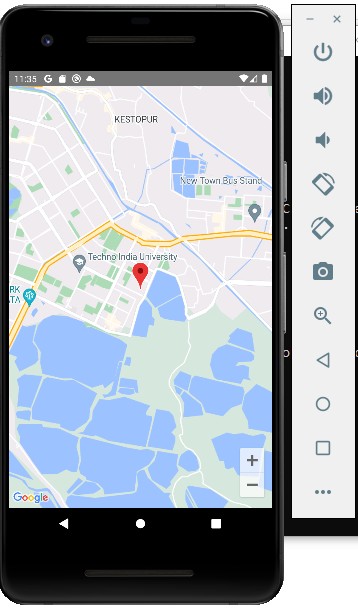
- zoomControlEnabled- A prop that decides whether the zooming in or out features is enabled using buttons -,+. You can find controls or buttons at the bottom right of the map screen. Refer to image 1. Here, It is true.
- initialRegion- This prop specifies what should be shown on the screen when it is initially rendered. For this project, it will show Kolkata as it has latitude and longitude values for the same city, i.e., 22°34′26″N 88°26′16″E.
<Marker coordinate={coordinates} /> - It is a component that renders a marker on the map. It takes in an object with latitude and longitude as props.
- The coordinates are passed to it from the state variable coordinates.
- It is a state variable that stores the latitude and longitude of our current location.
- Its initial value is set to 22.57371753630649, 88.4376725968472 which are coordinates of Kolkata in India.
1
2
3
4
5
6
7
8
9
10
11
12
13
14
15
</MapView>
    </View>
  );
};
export default App;
const styles = StyleSheet.create({
  MainContainer: {
    position: 'absolute',
    top: 0,
    left: 0,
    right: 0,
    bottom: 0,
    alignItems: 'center',
    justifyContent: 'flex-end',
},- It styles the MainContainer with a definite position, top, left, right, and bottom, alignment of items, and justification of content.
1
2
3
4
5
6
7
8
mapStyle: {
    position: 'absolute',
    top: 0,
    left: 0,
    right: 0,
    bottom: 0,
  },
});- Here, the code syntax designs the Map.
Navigating through the map on the emulator
- Firstly, you need to start the emulator to ensure that the app is running successfully. For this, run the command npm install on your project’s terminal. With this, you can install all the required dependencies required for the current app.
- After this, run
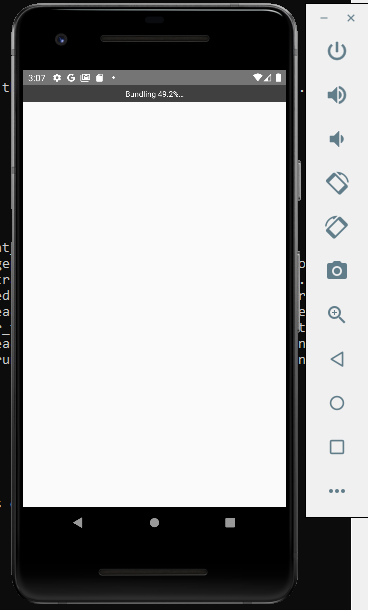
npx react-native run-androidon the same terminal to start your emulator. Wait until the bundling is 100% complete. Refer to image 2.

Image 2
- Here, you will be directed to the map screen on your emulator as given in image 3. You can zoom in or zoom out using any touch gestures and also with the +, - buttons at the bottom right of the screen.

Image 3
Final thoughts
Integrating features of maps needs complex coding lines. With the RN framework, you only need to install the third-party react native package to get 50% of the task done. Other than this, you have to use different components, hooks, and props. For the current project, I have used StyleSheet, dimensions, View, MapView, Marker, and useState. Using the framework, you only need to design a small line of coding and build the google Maps features in your react native app.

A science graduate who has a keen interest to lean about new technologies and research area. With an experience in the field of data analytics and content writing, she aims to share her knowledge among passionate tech readers.