
How to customize the splash screen and app icon in your React Native app?

Splash screens and app icons are a significant part of the app-building process. You can change in whatever way you want. Using the React Native framework, the process gets much easier. In this blog, we will understand how you can change both the app icon and the splash screen in your React Native app.
What is an app’s splash screen?
A splash screen in an app is nothing but the screen that is displayed immediately after opening the app. It hardly stays for some seconds before the user gets into the actual content of the app.
Here, we will learn how you can create this splash screen in your app.
What is called an app icon
You might have seen a small logo on your phone device, with which you can differentiate between different apps. App icons are those logos unique for different applications.
Let's see how you can build your own app icons.
There is some learning that you need to acquire beforehand.
Understanding the pre-required learnings
- Set up the environment of React Native in your dev system- This is about installing software like Android Studio, Node.js, and other SDKs. Here, we will not be discussing the process to set up the environment. If you want to learn and start from scratch, check the attached article.
- Learn to build a basic app in React Native- This is the next step after you are done with the setup process. It is about adding core components of React Native and building the codebase in a particular App folder. I have a reference blog that you can check and learn about the app-making process from the beginning. Now we will cover the significant part of the current project, which is to download the third-party library.
How to install the third-party RN package:
react-native-splash-screen
There is hardly any coding part that you have to learn to add the app icon and splash screen to the app. However, you have to install an open-sourced library, which is the react-native-splash-screen. With this, you can set the hold time of the Splash screen.
To install the package, you have to create a terminal from your app and pass npm i react-native-splash-screen --save. It will add the package to your app directory.
Note that, we are considering a manual installation for the plugins. If you want, you can consider automatic linking or installation but my suggestion would be to go for manual installation.
Now, follow the steps as I proceed.
Run the code editor from your project folder.
- Open
androidand go tosettings.gradle folder. Add the line:
include ':react-native-splash-screen'
project(':react-native-splash-screen').projectDir = new File(rootProject.projectDir, '../node_modules/react-native-splash-screen/android')
android folder and then go to the app folder. Now you have to open the build.gradle file. Search for the dependencies section in the build.gradle file. You need to add the line: implementation project(':react-native-splash-screen') in this build.gradle file.
3. Open the android folder and go to the app folder. Then open the src folder. You will find the main folder. As you open the main folder, go to java\com\awesomeproject and then to the MainApplication.java file. Here, add import org.devio.rn.splashscreen.SplashScreenReactPackage;
4. Open the android folder from your app, go to app, then open src folder. You will find MainActivity.java file under ./main./java\com\awesomeproject. As you open the MainActivity.java file, include the below-given line.
5. Again, you have to add the following line in the MainActivity.java file.
1
2
3
4
5
@Override
protected void onCreate(Bundle savedInstanceState) {
SplashScreen.show(this); // here
super.onCreate(savedInstanceState);
}
6. Create a layout folder under the res folder. You can find the res folder under the main folder. Now you have to create a file named launch_screen. This will be in xml format. In this newly created launch_screen.xml file, you have to add
1
2
3
4
5
6
<?xml version="1.0" encoding="utf-8"?>
<RelativeLayout xmlns:android="http://schemas.android.com/apk/res/android"
    android:orientation="vertical" android:layout_width="match_parent"
    android:layout_height="match_parent">
    <ImageView android:layout_width="match_parent" android:layout_height="match_parent" android:src="@drawable/launch_screen" android:scaleType="centerCrop" />
</RelativeLayout>
Note that, you have to add this content from your code editor. You cannot do this from your local file explorer where you saved your app.
Now, the plugin configuration is done. All you need to do is add the image for both the app icon and the splash screen.
Storing the image for the splash screen and app icon
Search for an image from the web, which you will set as a splash screen. Build a drawable folder. You have to create this folder under the res folder. Save the image in the drawable folder and name it launch_screen. Also, you have to save the process.
Although there are no dimension specifications for the splash screen image, for the app icon, there are definite dimensions that you need to consider. First, download a particular image for your app icon and save it in all the folders: mipmap-hdpi, mipmap-xxxhdpi, mipmap-xxhdpi, mipmap-xhdpi and mipmap-mdpi. You can find these folders in the res folder. You have to store two icon images in the three folders namely mipmap-xhdpi, mipmap-mdpi and mipmap-hdpi. One has to be in rectangular shape and the other one has to be in a round shape. Refer to image 1 for the two images stored in the mipmap-mdpi folder of my project. Like ways, you have to save two icon images in the other two folders.

Image 1
On the other hand, store a single image in the remaining folders.
Note that, you will find default icon images in these five folders. Substitute all these default pictures with your downloaded images.
Now, the last two steps are remaining. One is to create the App.js folder and the other one is the app testing task.
Adding codebase in the App.js file
Go to your code editor from your app. You will notice a file named App.js. Start editing here.
Import the required React Native components. The code syntax is:
1
2
3
import { StyleSheet, Text, View } from 'react-native'
import SplashScreen from 'react-native-splash-screen';
import React,{useEffect} from 'react'
Besides the React Native core components, you should get the SplashScreen component from react-native-spalsh-screen. This is the main component of this current project.
Next, use the useEffect hook to wrap the SplashScreen component. As per the syntax, the splash screen will disappear after two seconds. Let’s see what the syntax is.
useEffect(()=>{
SplashScreen.hide();
},2000)
The major part of the codebase is to return a text element ‘App’ after the splash screen disappears and is constructed as given below.
1
2
3
4
5
6
7
const App = () => {
  return (
    <View>
      <Text>App</Text>
    </View>
  )
}
Don't forget to export the App function that you have introduced with the line const App = () => {.
You can use the following syntax for this.
export default App
Now, you have to test the app.
Executing the built program or app
Open your cmd from the created project. Run npm install and then npx react-native run-android. As your emulator starts, you will see the welcome screen on your emulator as in image 2.

Image 2
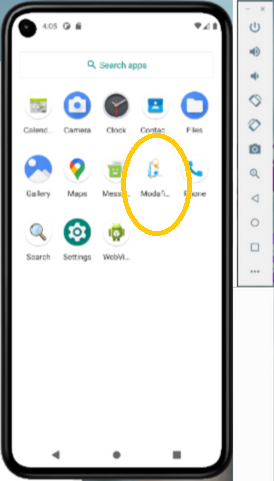
Also, refer to the encircled section in image 3 for the app icon. You can see this app logo or icon on your device's app panel.
This way you can download your preferred image and set it as the splash screen for your app. In the same manner, you can also customize the app icon. In the beginning, you may find difficulty using the React Native framework but soon you will learn using the framework.

A science graduate who has a keen interest to lean about new technologies and research area. With an experience in the field of data analytics and content writing, she aims to share her knowledge among passionate tech readers.


