
Easy screen navigation with React Native's Drawer Navigator
Do you want to add easy screen navigation in your app? Then you definitely need to consider the createDrawerNavigator component of React Native. Not aware of this component? Are you familiar with how to get the interface for smooth screen navigation? You don't need to worry. In this blog, we will discuss all these steps in detail.
Why do you need a Drawer Navigator?
You need a Drawer Navigator to organize the content of your app such that you don't have to render all the menus to go to other screens on the main screen. You can store these menus on the drawer navigator with which the user can navigate to other app screens. It is like a real drawer where you can store some of your staff to make the table clutter-free. This is all the purpose of a Drawer navigator.
Also, it is a way to create an interactive UI. Further, it can improve the app’s UX.
There can be two ways to design a drawer navigator. You can either add a button at the top left position of your app, clicking on which the user can get the drawer navigator. Or else, you can design it in a manner such that the user can swipe from the left corner of the app screen and access the drawer navigator.
What are the prior-needed learnings?
- Learn to set up the React Native environment
Here, you need to download software and set up the same. The software that you will need are Node.js, Android Studio, SDKs of Android Studio, and an IDE (here, I have used VS Code). Also, note that we have considered React Native CLI for the project. So, you don't have to get the software associated with Expo CLI.
Most importantly, you don't have to focus on this step, if you have already worked as a React Native developer. In that case, you might have done this setup. However, if you are new to this, you need to check the linked article and learn all the steps from scratch.
- Get a basic template
This is the task that you must accomplish before proceeding further. Make a template with the React Native framework. Follow the simple steps mentioned below if you don't know how to get this task done.
- Make a folder on your system’s home screen. Ensure that it is created in your C drive.
- Go to the command prompt from this newly created folder.
- Type
npx react-native init Drawer-Navigator--version 0.68.1on the command prompt. Press enter. - Your template will be built. Drawer-Navigator is its name and you are using React Native of version 0.68.1.
Open the code editor from this Drawer-Navigator template file and follow the following section.
- Configuring third-party React Native package
This is the third step. Here, you have to create a new terminal on your code editor and execute npm i @react-navigation/native. This will install and link the third-party plugin @react-navigation/native in your project.
Another third-party plugin that you have to install is @react-navigation/drawer. For this, you need to execute the command: npm i @react-navigation/drawer in your project terminal.
So we are done with the fundamental steps. Let's see how we can design the codebase in three different files.
Let us now build the .js files.
Creating three .js files for the project
First, you have to create two .js files in your template folder (Drawer-Navigator). They are Home.js and About.js. However, App.js is already present in the React Native template folder. Let's start the process.
Home.js file
Open the code editor. Note that it has to be from your project file in which you want to embed the code. Make a file and name it ‘Home.js’.
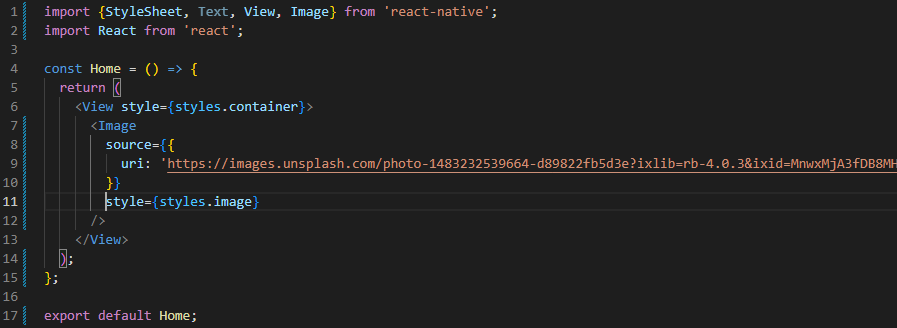
Image 1
This will be a simple screen with no text elements and buttons.
However, you can import the basic components like View, Image, StyleSheet, and Text from the react-native library.
Moving forward, write const Home to introduce the new component. Also, return the Image and View components. Here, I have specified an Image source that will be displayed on the entire screen (Home Page).

Image 2
The snippet shown in image 2 shows the technique of using StyleSheet and style the objects. Here, the objects chosen are image and container.
About.js file
Create another file and address it as ‘About.js’ in your code editor. Now, frame the codebase for this file.
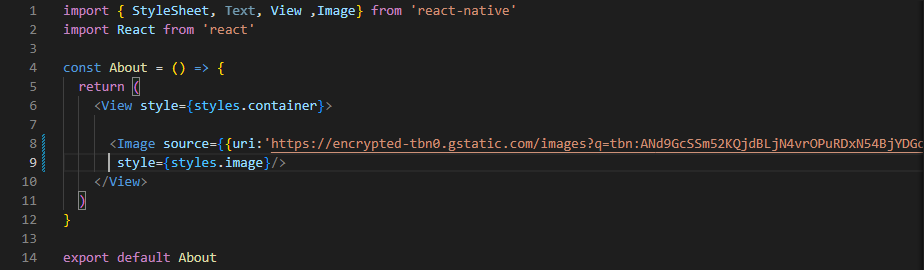
Image 3
This is quite similar to that of the codebase embedded in the Home.js file. However, what you need to change is the name of the component, i.e. the About Component in place of the Home component.
All the Image elements and styling parameters will be the same as that of the Home Page screen. This will create a basic About screen with no clickable buttons, header or other content.
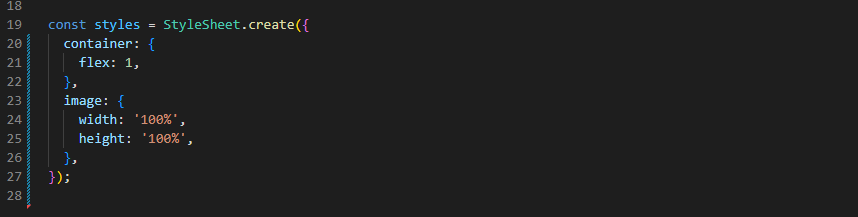
Image 4
This is the designing part. You can add the snippets as it is in your code editor to style the container and the image objects.
App.js file
You don't have to build any new App.js file. You can find this file already stirred in your template file. All you have to do is delete all the codebases already stored in the App.js file
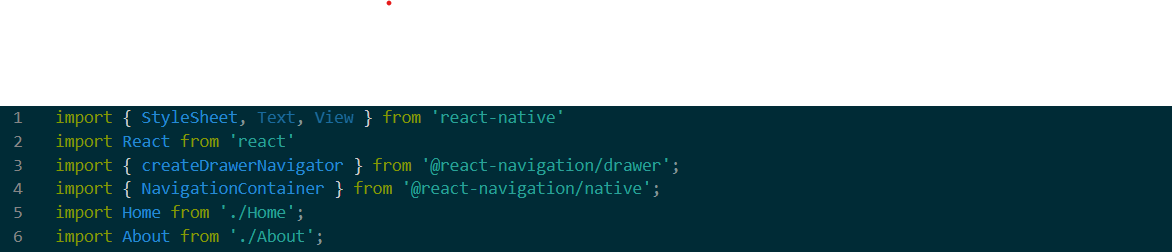
Image 5
Here, you have to import all the components mentioned in image 5. Note that, here we have to use components from the third-party plugin @react-navigation/drawer and @react-navigation/native. Also, import the components (About and Home) that you recently created in other files.
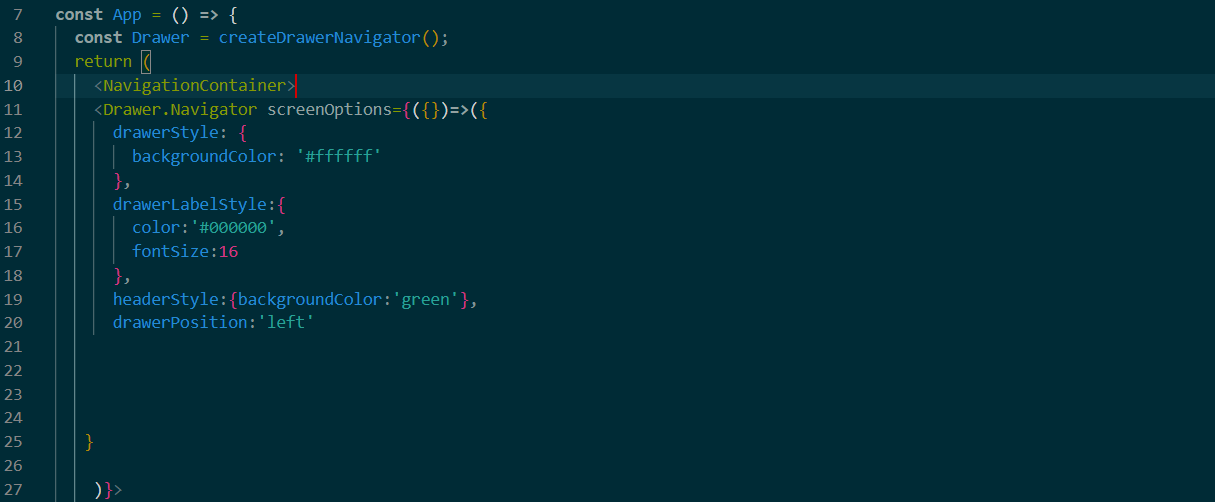
Image 6
Introduce the App component and return NavigationContainer as a tag.
screenOptions are used to style the drawerStyle, drawerLabelStyle, and headerStyle. Refer to the code snippets shown in image 6.

Image 7
Here, the option of Home screen and About screen are embedded under the Drawer.Screen element.
Complete the codebase of the App.js file using the export statement.

Image 8
You can skip this step. It won't affect your project. However, using the StyleSheet component, you can style the app and the considered styling objects.
Now, let’s test the program.
Program execution on the emulator
For this you have to run the code on the cmd.
Open the command prompt from your project folder (DrawerNavigator). Here, execute npm install, and then after the packages are installed, pass npx react-native run-android.
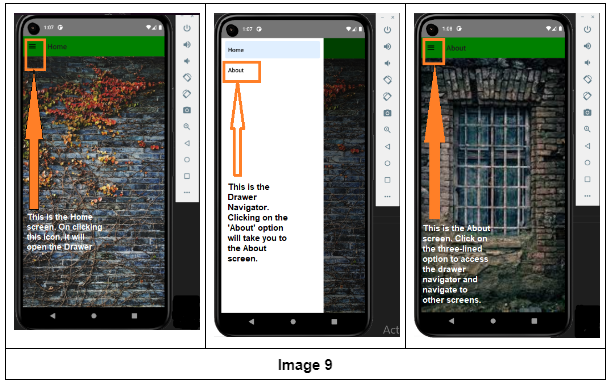
Your emulator will start and your app will be rendered on the emulator screen as shown in image 9. Also, there are instructions in colored boxes and texts to help you with in-app navigation.

A science graduate who has a keen interest to lean about new technologies and research area. With an experience in the field of data analytics and content writing, she aims to share her knowledge among passionate tech readers.


